Total Pageviews

Tuesday 28 February 2017

Tags made with Inverted Scallop Square Frame Die

Hello Dear Friends,


Shalini Pahwa here, today i would like to  share some work using inverted scallop square frame die, and i'm using it as a tag embellishment for gift boxes, message holder, in scapbook/layout, mini album or anything according to your requirements.

 I have created four different tags with different sentiments and different stamp fussy cutz with sequins and twine tied on the top.


DCAM Products Used:


I hope you all will like my work
and would love to hear your words.

Have A Nice Day!!!

Please follow DCAM and the team on various social media platforms.


The website is updated with a new look and is ready to take orders from USA, Canada, Guam, Mexico, Australia and New Zealand, all other countries will be added soon. 

Monday 27 February 2017

Mixed Media Tags

Hello friends,

Today I want to share two tags I made using the Cross Hatch die released in February. It is a perfect die to create back ground or add texture. When I received this die my first impulse was to try texture for Mixed media.

1.

I took many die cuts with the die and stuck few of them together for more depth. I took a water color paper and trimmed it to 6 x 3.5 inches. I stuck the die cuts and gave a coat of white gesso. I prepared the back ground using various sprays and colors. I stamped using Grunge effects stamps with Black Archival ink. I took a leaf mdf cut out and coated it with gesso. I colored that also with the colors used for the background. I added few handmade flowers and sequins and the sentiment.


2.

I took another piece of watercolor paper with the same measurement as the above. I coated it with black gesso and colored it with Art Alchemy acrylic paints. You can see the metallic sheen in the colors. I added the die cuts and made a few splashes with white gesso. I added few layers with doily, cheesecloth and lace. I added few hand made flowers and finished with sequins and sentiment.


 Here is a picture of both the tags.


Products used:

Crass Hatch Die
Frozen Mix 


Purple Passion Mix
Archival Ink

Hope you liked my projects and inspired you to try out the amazing die release.

Till next time - Happy crafting
Gayatri

The website is updated with a new look and is ready to take orders from USA, Canada, Guam, Mexico, Australia and New Zealand, all other countries will be added soon. 

 Do follow us on other social media also:


Saturday 25 February 2017

Bold XL Number Die - Celebration

Hello my dear friends, Piyanki here today with some fun, easy projects using the newly released Number Die.

Now Number, alphabets are something we would need it almost every time in most of our project. DCAM has the complete range and you dont have to look here and there.

The Dies are  sturdy and gives a clean cut and you see the complete range HERE.

Now today I have 3 cards to share.


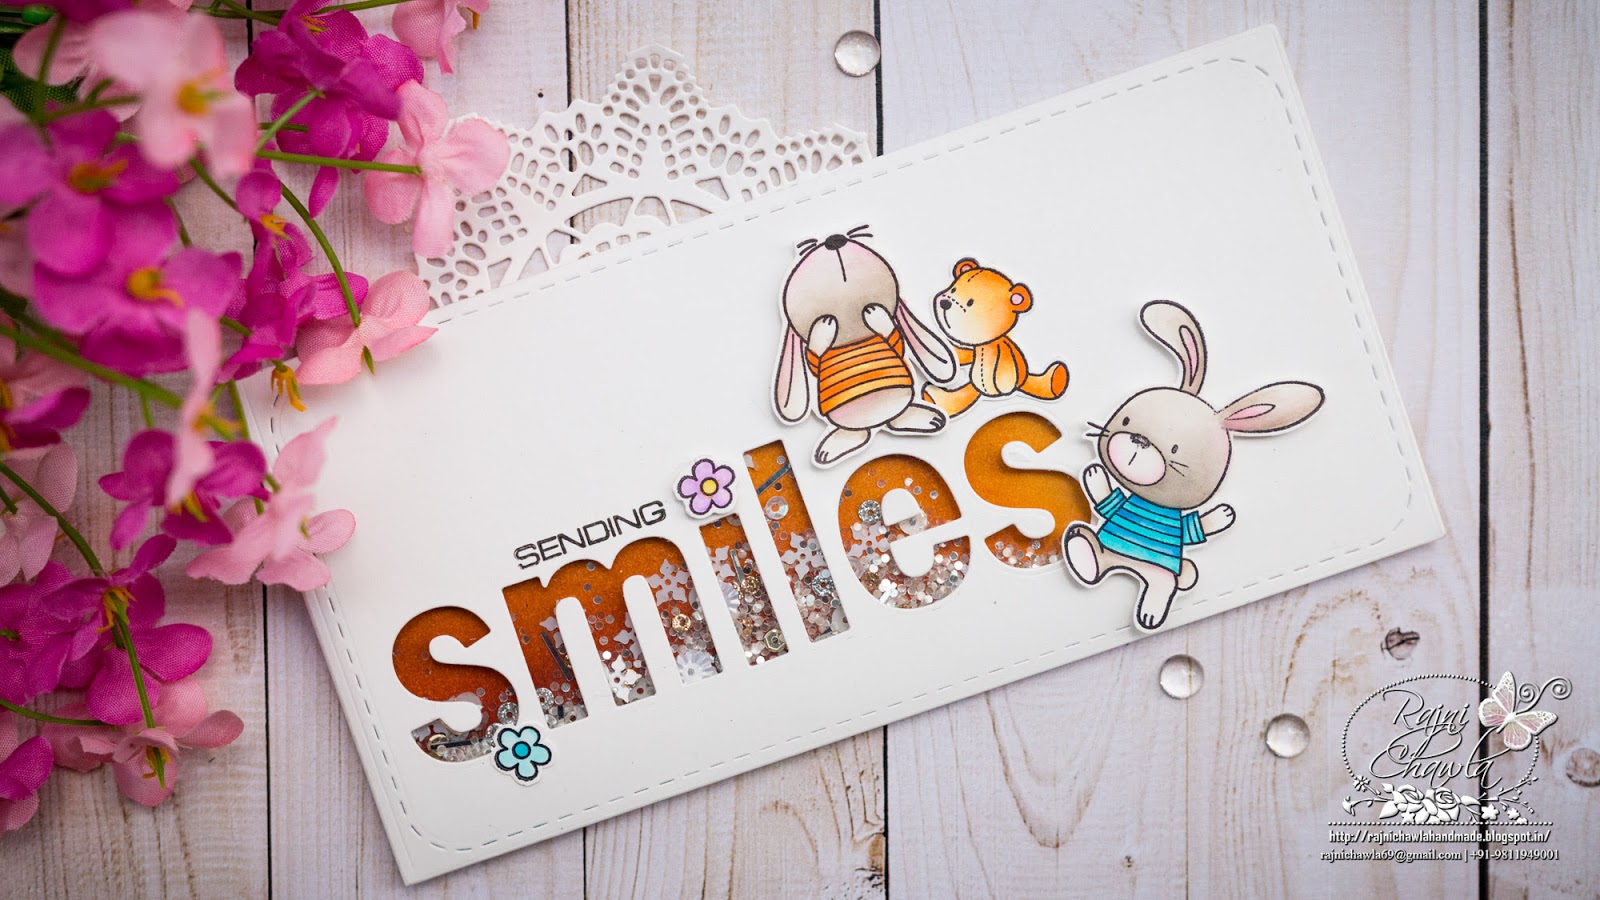
How to : Cut a 5,5 x 4.25 from a White CS. Take out all your small stamps that you have and random stamp on the layer. Use the Border stitch die and die cut twice to create a single layer. Later die cut multiple XL Number Die to create the Birthday year. End it with a sentiment.


How to: Cut a 5.5" X 4.25" from a Black CS. Use a 3" X 4" and use some multi color jute twines and create the background. End one layer uneven. Die Cut multiple pieces of Bold XL Number die and stack together to create the dimension. Die cut a border and layer the number along with a sentiment,

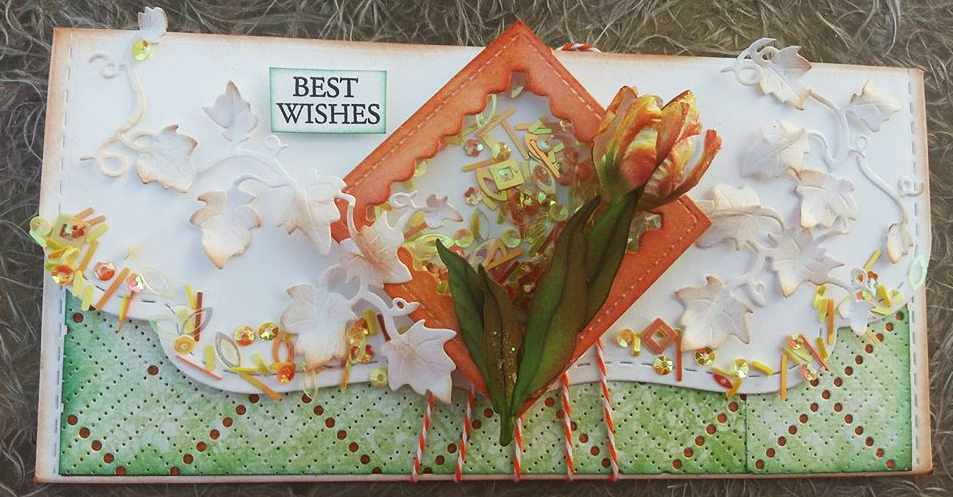
The third card is a little different from the top 2 .


How To : Cut a 5.5" X 5.5" white CS. Cut another CS and dry emboss it. Cut a Banner from a CS and layer it with Bold XL number die with the tone on tone color. Die cut the number 25 from a silver paper and then stack multiple layers. End it with a sentiment.

Thanks for stopping by and do share how you like it. I am listing down the products I have used.


You can find us here
Blog | Twitter | You Tube | Facebook


Thursday 23 February 2017

Balloon dies

Hello friends,
 today i am sharing project inspiration using newest DCAM release "Balloon dies".For the first card i made something soft and subtle using "Balloon dies" and "Its a boy/girl die".I used lawn fawn Lets polka pattern papers for my card base and to die cut the balloons.


For the second card,i used some contrast neon colors against black.I made some splatters on the black cardstock using acrylic paints,die cut the balloon in white cardstock and colored them with distress inks.For the sentiment "Celebrate" i colored the white cardstock with zig pens in yellow and pink,and then die cut it.


Supplies used:


Thank you for stopping by,
kavi


The website is updated with a new look and is ready to take orders from USA, Canada, Guam, Mexico, Australia and New Zealand, all other countries will be added soon. 
Thank you so much for playing along with us and have a great day. Please follow DCAM and the team on various social media platforms. 

Wednesday 22 February 2017

DCAM New Release Die-Pierced Dotted Background Die with Envelope Die

Hello Dear Friends,
Shalini Pahwa here, today i'll be sharing a project on New Die Release called DCAM Pietced Dotted Background Die. with Envelope Die.

For this envelope, take green card-stock and use pierced background die twice as the envelope size is 7.25 , then use inka gold randomly and paste the peacock die-cut on the left and right side. Then use cover up tag (You get 2 pieces in a set ( coverup Tag+ envelope die) and fold it and attach another green card-stock to join the tag and paste two more peacock die-cuts with foam tape and embellish it with sequins and crystal clear drops. Add best wishes sentiment using DCAM word die.


For another envelope, i had used the back of the envelope, where the flap is decorated with sequins and ivy leaf and made shaker element with the inverted scallop square frame die, and made tulip flower. At the base , cut the orange card-stock and on top taken green colored pattern-paper cut with pierced background die and tie this envelope with twine and add sentiment.


I hope you all will love  and enjoy this work
and would love to hear your words.

Have A Great Day!!!


DCAM products used:


C


Please follow DCAM and the team on various social media platforms.


The website is updated with a new look and is ready to take orders from USA, Canada, Guam, Mexico, Australia and New Zealand, all other countries will be added soon. 


Tuesday 21 February 2017

February DCAM release inspiraion by Rajni Chawla

Good Morning all….!!
Rajni Chawla here from Timeless Creation’s again!! Past one year I have been collecting various stamps which I thought would tempt my daughter to jump into this fabulous craft industry. Last year I gifted her a huge collection of critter stamps and dies on her birthday too. I was surprised to see her unexpected reaction on getting those lovely stamps as most of the crafters including me,  will jump and scream with excitement getting those in hand.
Awww….Really, Did you buy these for me??
Naaahh!! Seriously, NO Mom!! And she immediately pointed the finger towards me. She was so true. It was me who was getting tempted to try such cuties. Though I have my very own style of working but every day my fellow crafters have left me spellbound with their creativity and always inspired me to try my hands on cute and cuddly stamps.
 Few days back I shared my very first try on these and it was also appreciated by you all.  If you missed it you can check the post HERE. Today, I am again sharing few more cuddly buddly envelopes which I created using the latest release of DCAM. I was already in love with designing envelopes and now gone crazier playing with DCAM Envelope Die 
. Their latest release of Inverted Scalloped Frame series is like a cherry on top. These gave me so many options to create windows, frames and many combinations if combined with different shapes. The size of alphabet dies made it so easy to create customized sentiments and titles for a variety of projects. Though I made a variety of envelopes, many techniques are still left to explore.
Here, I go with my today’s crafty post. I am again sorry for such a lengthy and picture heavy post. But I am sure you are all going to love it again.


I so liked the envelope that I tried a card too with the same concept.


Look at the cover the page Piercing die by DCAM.....I am simply loving it.


In this card, I combined Double stitched Circle Die and Cover the page Piercing die together to create the backdrop for my handpainted flower bouquet. 


The stamps used here are from Your next stamp, My Favorite Things and Inspired by Stamping. Most of all the dies used are from Die Cuts And More. That’s all from me today!!
All the supplies used from DCAM store are directly linked to their website for your reference. I hope, I was able to inspire you a little to pull out your supplies. Do visit my blog Timeless Creations for more inspiration and leave some love.

Supplies Used


  1. Zig Real Brush Markers
  2. Your Next Stamps 
  3. Stampoholic
  4. Envelope Die
  5. Double Stitch Circle Die
  6. Lower case Alphabets bold XL Die
  7.  Balloons Die
  8. Pierced Dotted Background
  9. BOLD XL Number
  10. Cross Hatch Die
  11. Sequins
  12. Distress Inks


--